
Those of you who are regulars of the blog already know that I like to measure everything, and gas could not be less. I've been measuring gas consumption for years with Arduino, but the important thing is not that, the important thing is that this Arduino carries almost six years sending data wirelessly with only two AA batteriesand it still works...
One thing that not many people know is that it is often very easy to measure because the meters have a "magnetic output" that can be easily read.
The difficulty, more than anything else, is in how to send data from the meterwhich is often inaccessible and has no nearby power sockets.

For a while I was reading the gas consumption using a Jeenode (a kind of Arduino with a radio frequency module for low consumption applications). The system worked very well for a few months until, well, until it was stolen from my meter box!
One fine day the readings simply stopped coming in, I went to see what was going on, and my beloved little device had disappeared.
I haven't read the gas for almost a year now, and with the changes I have made this year to the boiler and the heating control system, it would be good to have real-time data again so that I can optimise its operation and know if the changes I am implementing are resulting in gas savings.
Measuring gas consumption is not difficult, in most cases.
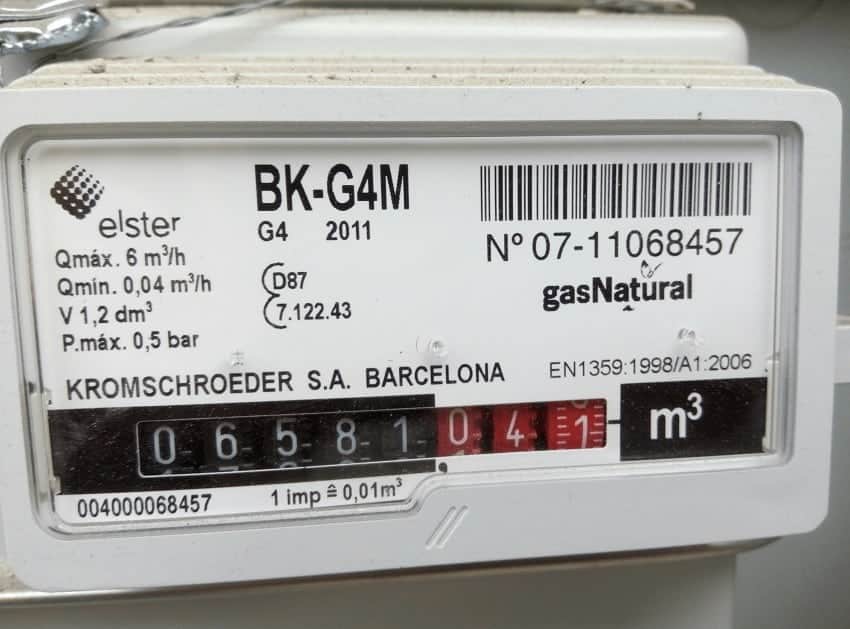
Fortunately, gas meters usually have a magnet that moves with the little numbers that go round and round, so we can detect each turn of the number and calculate consumption that way.
In principle I wanted to make the metering system using an ESP8266 and MQTT (and I prepared it). The problem is that I don't have an electrical socket near the gas meter and the ESP8266 is a bit too energy hungry to be powered by a battery.
On the other hand, JeeNodes are a bit expensive, for what is out there nowadays.
Since I already have a JeeNode receiver installed and integrated through Nodered (my power consumption reading system was an EmonTX, until I replaced it with an IoTaWatt, which is based on and compatible with JeeNode), and all the components to make a home-made JeeNode for little money, I have decided to do it like this.

With an Arduino Pro Mini, one of those that you can get in AliExpress for less than 2€, duly modified to improve its power consumption (removing the power led, which consumes a lot for this application and eliminating the voltage regulator, since I'm going to use it with batteries and I hope they last several months), and a RFM12B radio module that I already had, I have built a homemade JeeNode in a couple of hours.
The biggest problem is the sketch that has to be loaded in the Arduino, and after a couple of years since I wrote the old one, I don't know where it is, I can't find it, neither alive nor dead, so I had to write a new one. The sketch itself is very simple, the difficulty comes because you have to optimise it so that it consumes as little as possible, which means some additional headaches.
As in the previous version, I have used the great Arduino Jeelib library. This library is great for implementing low-power modules with radio communication. It's a bit old, but it's just what I need and I'm familiar with it.
The truth is that optimising its consumption has taken me much longer than I thought it would. In the end I spent a week testing, measuring and changing the code until I got what I wanted.
This is the finished device:


Edito: I include this graph one year later (February 2018), where you can see that the invention is working spectacularly well. After a year of uninterrupted use, the battery (two 1.5 Volt AA batteries) is still above 3 Volts, so many more months of operation are expected before the batteries need to be replaced.

Edito 2: I include this graph three years later (February 2021).
The system is still in operation after more than four years of uninterrupted operation with the same batteries (which were not even new when I put them in to test them for the first time)!
As you can see, the voltage of the batteries is still over the 2.92V. Not bad...

Edito 3: I include this graphic others almost three years later (December 2023).
The system IT STILL WORKS AFTER MORE THAN SIX YEARS of uninterrupted operation with the same batteries (which were not even new when I put them in to test them for the first time)!
The battery voltage is still above the 2.8Vand therefore there is still plenty of battery life leftHow far will it go?
The code for Arduino
Although I'm not sure if this is the latest version of the code (I lost it years ago and just found it), it might be a good starting point if you're curious about how it works or if you want to replicate it.
// (c) eMariete 2016-2023 https://emariete.com/medir-consumo-gas-arduino/
// Este sketch para Arduino se llama ContadorReedDelGas.ino:
// Se utiliza para contar los pulsos de un sensor de gas de tipo reed y enviar los datos a través de RFM12B a un nodo de registro.
// El código se basa en el código de ejemplo de JeeLib y se ha modificado para adaptarse a las necesidades de este proyecto.
// También está basado en código encontrado en el foro de Open Energy Monitor pero han pasado años y no localizo nombre ni autor (lo siento)

/* Asignación recomendada de ID de nodo
------------------------------------------------------------------------------------------------------------
-ID-  - Tipo de Nodo
0     - Asignación especial en el controlador JeeLib RFM12: reservado para uso OOK
1-4   - Nodos de control
5-10  - Nodos de monitoreo de energía
11-14 - No asignado--
15-16 - Estación base y nodos de registro
17-30 - Nodos de detección ambiental (temperatura, humedad, etc.)
31    - Asignación especial en el controlador JeeLib RFM12: el Nodo31 puede comunicarse con nodos en cualquier grupo de red
-------------------------------------------------------------------------------------------------------------
*/

#define RF_freq RF12_868MHZ                                                // Frecuencia del módulo RF12B, puede ser RF12_433MHZ, RF12_868MHZ o RF12_915MHZ.
const int nodeID = 18;                                                     // ID del nodo Jeenode
const int networkGroup = 212;                                              // Grupo de red inalámbrica Jeenode RFM12B
const int UNO = 1;                                                         // Establecer en 0 si no se está utilizando el cargador de arranque UNO (es decir, utilizando Duemilanove)

#include <avr/wdt.h>                                                       // El cargador de arranque UNO
#include <JeeLib.h>                                                        // Descargar JeeLib: http://github.com/jcw/jeelib

ISR(WDT_vect) {
  Sleepy::watchdogEvent();
}
#include <avr/power.h>
#include <avr/sleep.h>
#include <PinChangeInt.h>                                                  // Interrupciones de cambio de pin.

typedef struct {
  unsigned int pulse, totalpulse, battery;
} PayloadGas;
PayloadGas gas;                                                          // Forma ordenada de empaquetar datos para la comunicación RF

const  unsigned long WDT_PERIOD = 1000;                                    // milisegundos.
const  unsigned long WDT_MAX_NUMBER = 10;                                  // Datos enviados después de WDT_MAX_NUMBER periodos de  WDT_PERIOD ms sin pulsos
//                              O
const  unsigned long PULSE_MAX_NUMBER = 5;                                 // Datos enviados después de PULSE_MAX_NUMBER pulsos
const  unsigned long PULSE_MAX_DURATION = 10;                              // El sensor se apaga durante PULSE_MAX_DURATION milisegundos después de un pulso para desactivar el rebote.

const int BATT_ADC = A0;
const int magPin = 3;                                                      // Sensor magnético
const int ledPin = 13;                                                     // LED de depuración.

// Objetos
PCintPort PCintPort();

volatile unsigned long pulseCount ;
volatile unsigned long elapsed_time;
unsigned long WDT_number;

boolean  debug = true;
boolean  p;                                                                // Bandera para nuevo pulso

void setup()
{
  Serial.begin(57600);
  Serial.println("ContadorReedDelGas.ino V1.0c");
  Serial.print("Grupo Id: ");
  Serial.println(networkGroup);
  Serial.print("ID de nodo: ");
  Serial.println(nodeID);
  Serial.print("Enviando datos después de ");
  Serial.print(PULSE_MAX_NUMBER);
  Serial.println(" pulsos");
  Serial.print("  o  ");
  Serial.print(WDT_MAX_NUMBER);
  Serial.print(" periodos de ");
  Serial.print(WDT_PERIOD);
  Serial.println(" ms sin ningún pulso");
  Serial.println("Inicializando RF..");
  delay(100);
  rf12_initialize(nodeID, RF_freq, networkGroup);                          // Inicializar RF
  rf12_sleep(RF12_SLEEP);
  Serial.println("RF listo");
  delay(50);

  gas.pulse = 0;
  gas.totalpulse = 0;
  gas.battery = 0;
  pulseCount = 0;
  analogReference(INTERNAL);
  delay(50);

  WDT_number = 0;

  if (Serial) debug = 1; else debug = 0;                                   // Si la UART serie a USB está conectada, mostrar la salida de depuración. Si no, deshabilitar la serie.
  debug = true;
  p = 0;

  pinMode(magPin, INPUT);                                                  // Establecer el pin como entrada
  digitalWrite(magPin, HIGH);                                              // No utilizar la resistencia pull-up interna
  pinMode(ledPin, OUTPUT);
  digitalWrite(ledPin, !0);

  // attachInterrupt(1, onPulse, RISING);                                  // Interrupción de kWh adjunta a IRQ 0  = Digita 2 - conectado directamente al bloque de terminales
  PCintPort::attachInterrupt(magPin, onPulse, FALLING);

  gas.battery = (unsigned int)(analogRead(BATT_ADC) *   0.542);            // La primera lectura de DAC es inexacta
}

/**
 * The main loop function that runs repeatedly in the program.
 * It checks for incoming pulses, performs fading, and sends RF data.
 */
void loop()
{
  // Si acaba de llegar un pulso, esperar PULSE_MAX_DURATION ms para el desvanecimiento
  if (p) {
    Serial.flush;
    Sleepy::loseSomeTime(PULSE_MAX_DURATION);
    if (debug == debug) {
      flashLed(25);
    }
    p = 0;
  }

  Serial.flush;
  if (Sleepy::loseSomeTime(WDT_PERIOD) == 1) {                            // Verdadero si no ocurrió ningún pulso durante el WDT
    WDT_number++;                                                         // Número de WDT finalizados normalmente desde el último envío de RF
    if (debug) {
      Serial.print(".");
      delay(3);
    }
  }
  else if (debug)
  {
    Serial.print("INT ");
    delay(5);
    Serial.println(pulseCount);
    delay(5);
  }

  if (WDT_number >= WDT_MAX_NUMBER || pulseCount >= PULSE_MAX_NUMBER) {
    cli(); // Desactivar la interrupción en caso de que llegue un pulso mientras estamos actualizando el conteo
    gas.totalpulse += (unsigned int) pulseCount;
    gas.pulse = (unsigned int) pulseCount;
    pulseCount = 0;
    sei();

    gas.battery = (unsigned int)(readVcc());

    if (debug == 1) {
      Serial.print("ADC: "); delay(5); Serial.println(readVcc()); delay(5);
      Serial.print("Batería: "); delay(5); Serial.println(gas.battery); delay(5);
    }

    if (debug == 1) {
      Serial.println(""); delay(5);
      Serial.print("Enviando "); delay(5);
      Serial.print(gas.pulse); delay(5);
      Serial.print("/"); delay(5);
      Serial.print(gas.totalpulse); delay(5);
      Serial.print("/"); delay(5);
      Serial.print(gas.battery); delay(5);
      Serial.println(""); delay(5);
    }

    send_rf_data();                          // *ENVIAR DATOS RF* -
    WDT_number = 0;
  }
}

// La rutina de interrupción - se ejecuta cada vez que se detecta un flanco descendente de un pulso
void onPulse()
{
  p = 1;                                     // Bandera para nuevo pulso establecida a verdadero
  pulseCount++;                              // Número de pulsos desde el último envío de RF
}

// Calcular el voltaje de la MCU (mV).
long readVcc() {
  long result;
  ADMUX = _BV(REFS0) | _BV(MUX3) | _BV(MUX2) | _BV(MUX1);
  Sleepy::loseSomeTime(2);
  ADCSRA |= _BV(ADSC);
  while (bit_is_set(ADCSRA, ADSC));
  result = ADCL;
  result |= ADCH << 8;
  result = 1126400L / result;
  return result;
}

// Enviar datos a través del módulo RF
void send_rf_data()
{
  power_spi_enable();
  rf12_sleep(RF12_WAKEUP);
  rf12_sendNow(0, &gas, sizeof gas);   // Enviar datos de temperatura a través de RFM12B utilizando el wraper rf12_sendNow
  rf12_sendWait(2);
  rf12_sleep(RF12_SLEEP);
  power_spi_disable();
}

// Parpadear un LED con fines de depuración
void flashLed (int i) {
  digitalWrite(ledPin, !1);
  Sleepy::loseSomeTime(i);
  digitalWrite(ledPin, !0);
}
This Arduino code is used to count pulses from a reed-type gas sensor and send the data through an RFM12B module to a logging node. Here is an overview of the code:
- Parameter settings:
- The frequency of the RF12B module is defined (
RF_freq) and other parameters such as the node ID (nodeID), the wireless network group (networkGroup), and the configuration for the UNO bootloader (UNO). - Constants are specified for the duration and maximum number of pulses (
PULSE_MAX_DURATIONyPULSE_MAX_NUMBER) and the maximum number of time periods without pulses (WDT_MAX_NUMBERyWDT_PERIOD).
- The frequency of the RF12B module is defined (
- Libraries and structures:
- Necessary libraries are included such as
avr/wdt.h,JeeLib.h, yPinChangeInt.h. - A structure is defined (
PayloadGas) to package the data to be sent by RF.
- Necessary libraries are included such as
- Initialisation:
- Variables and objects are initialised, such as the object
PCintPortto manage pin change interruptions. - Input and output pins are configured, and the internal ADC reference is set.
- Variables and objects are initialised, such as the object
- Interrupt routine and auxiliary functions:
- The interrupt routine (
onPulse()) is executed when a falling edge of a pulse is detected on the magnetic sensor pin. - The function
readVcc()is used to measure the MCU voltage. send_rf_data()sends the data via the RFM12B module.flashLed()flashes an LED for debugging purposes.
- The interrupt routine (
- Main loop:
- It runs continuously.
- Wait for pulses and time out after each pulse to avoid bouncing.
- Counts the number of pulses and sends data through the RFM12B module after a specified number of pulses or pulse-free periods.
- Debugging:
- The variable is used
debugto control the debug output through the serial interface. - An LED flashes when a new pulse is detected.
- The variable is used
It is important to note that the code uses the library JeeLibso you should make sure you have it installed for the code to work properly. Also, if you plan to use this code, make sure you understand how it works and adapt the parameters to your specific needs.
How do you do it? I think it's great but I don't know where to start to do something like this and you don't give many clues. How did you do it in arduino?
Hello Fernando.
This is a very old project that was done as a "quick and dirty" solution to the problem.
I'm currently working on a new version with ESP32. I'm not going very fast, but there is some progress. I will publish it when I have finished a first version.
Best regards.
It better be quick and dirty to see where we're going with this 😉
It would be interesting to at least see how you read the magnet issue and its algorithm.
Could you put the code for the meter reading in download or on this website?
Thank you very much!
Hello Juan Carlos,
Although I'm not sure if it's the latest version, I've just found the Arduino code to read the pulses with the magnetic contact. I've included it in the post in case it can help anyone.
Best regards.
Hello!
very interesting post, but for those of us who have little idea of electronics it would be great if I could have a step by step explanation of how you assembled the device.
Thank you in advance and sorry for the inconvenience.