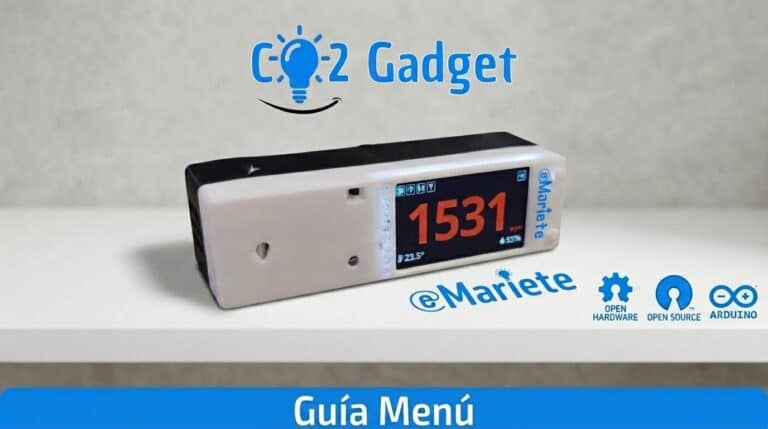
CO2 Gadget features a comprehensive, consistent menu system that works both on the meter’s display and via the serial port (USB). Whatever you see on the display is shown on the serial terminal, and vice versa, simultaneously. This means you can configure your meter even if it has no display or buttons, using just a terminal programme.
From the menu, you can view device information, configure all settings (Wi-Fi, MQTT, BLE, sensors, display, low-power mode, etc.), calibrate the sensors, save your preferences and reset the meter.
With buttons (on-screen)
- Long press on the top button = Press Enter / select an option
- Long press on the bottom button = Back / deselect
- A short press of the top button = Top / previous option
- A short press of the bottom button = Down / next option
Via serial port (USB)
Open a serial terminal at 115200 baud. Once connected, press the key * to access the menu. You can navigate using the following keys:
- * key = Press Enter / select an option
- Key / = Back / deselect
- + key = Down / next option
- Key – = Top / previous option
Furthermore, the numbers and letters on the keyboard are used directly to enter values (SSID, password, MQTT broker, etc.).
Please note: The characters /, *, + y - are reserved for navigating the menu. If you need to enter any of them into a field (for example, the SSID or the Wi-Fi password), you will not be able to do so via the serial port and will have to do it via the display or the web interface.

The main menu has six options. From here, you can access all the firmware’s features:
- Information — Read-only information from the device
- Configuration — Adjustment of all the meter’s settings
- Calibration — Calibration of the CO₂ sensor
- Save preferences — Saves the current settings to non-volatile memory (NVR)
- Reboot — Reset the meter (after confirmation)
- Exit — Exits the menu and returns to the main screen showing the measurements
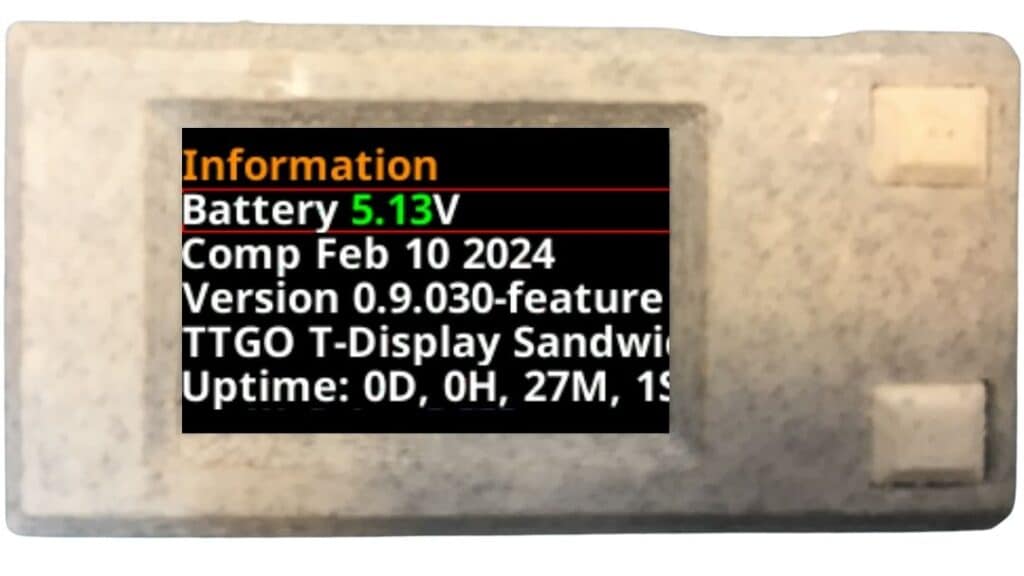
1. Information
Displays read-only data from the meter: battery voltage, firmware build date, full version, board type, uptime, IP address and BLE Device ID. Useful for quick diagnostics.
2. Configuration
This is the main part of the menu. It contains the following submenus, each with its own settings:


CO2 Sensor
Select the type of CO2 sensor connected and adjust the relevant settings:
- Sensor: Car (I2C, Sensirion SCD30/SCD40/SCD41), MH-Z19, CM1106, Senseair S8
- Automatic Calibration: Enable or disable automatic calibration (ABC)
- Chairman of the Board: Atmospheric pressure compensation in mbar (0–2000)
- Altitude: Altitude in metres for correction (0–9999)
- Orange / Red: CO₂ thresholds for the orange and red levels
- Debug Sensors: Enable sensor logs via the serial port for debugging


BLE
Bluetooth Low Energy configuration. Requires the ESP32 board to support BLE:
- BLE Enable: Enable or disable the entire BLE module
- MyAmbiance: Enable data output for the Sensirion MyAmbiance app
- BTHome: Enable the BTHome v2 protocol for Home Assistant
- BTHome Enc: Enable AES-CCM encryption for BTHome data
- BTHome key: Configure the bind key for encrypted BTHome
- Publish Sensors: Select which sensors are published by BTHome (CO₂, temperature, humidity, battery, PM2.5, pressure, PM10, voltage, PM1.0, PM4.0)

Wi-Fi
Configure the meter’s Wi-Fi connection: SSID, password and hostname. It also allows you to switch networks without needing the MyAmbiance app.

MQTT
Configure the MQTT broker: server, port, topic, client ID, username and password. Includes support for Home Assistant’s MQTT Discovery. Comprehensive MQTT Guide.

ESP-NOW
Configure peer-to-peer communication with other ESP32 devices without the need for a router. Parameters: the peer’s MAC address and Wi-Fi channel. Complete ESP-NOW Guide.

Battery
Adjust the battery parameters: reference voltage (default 3.3V), fully charged and fully discharged battery voltages, to ensure an accurate calculation of the charge percentage. Comprehensive Low Power Guide.

Temperature
This allows you to set a temperature offset (for example, if the sensor is in an enclosed chamber that is heated by the ESP32 itself). It also allows you to switch the display units between Celsius and Fahrenheit.

Display
Meter display options (depending on the type of display connected):
- Brightness: Screen brightness (TFT and OLED only)
- Off via USB: Turn off the screen when the meter is powered via USB
- Orient: Normal or inverted (screen rotated 180 degrees)
- Wake on CO2: Turns on the display when high CO2 levels are detected (orange threshold)

Outputs
Configuring the meter’s physical outputs:
- GPIO Outputs: Select whether the GPIO outputs are used for LEDs or relays
- Buzzer: OFF (no alarm), One time (beeps once when the red level is reached), Every x (repeats every x seconds, configurable from 5s to 5 min)
- NeoPixel: Set up the addressable LED strip


Low Power
Configure low-power mode: deep sleep intervals, CO₂ activation, timer activation, button activation, and which sensors/publications are triggered upon waking. Comprehensive Low Power Guide.
3. Calibration
Direct access to CO2 sensor calibration:
- Automatic Calibration. Enable or disable automatic calibration (ABC)
- Calibrate at 400ppm — Forced calibration using clean air as a reference (400 ppm)
- Custom Cal — Enter a custom reference value (400–2000 ppm)
- Calibrate at custom ppm — Run the calibration using the custom value

4. Save preferences
Save all current settings to the ESP32’s non-volatile memory (NVR). It is important to save before exiting the menu or disconnecting the meter, especially if you have changed any Wi-Fi or MQTT settings.
When you save, the system automatically checks whether MQTT is active upon wake-up and, if necessary, turns on Wi-Fi upon wake-up. The same applies to ESP-NOW.
5. Reboot
Restart the meter. A confirmation message «Reboot w/o saving» appears to prevent accidental restarts. If you select «Yes», a full restart of the ESP32 is performed. The SCD30 sensor is reset before the restart, if present.
Low Power (low power consumption)
This submenu is one of the most important in the firmware, particularly if you want your meter to run on battery power. CO2 Gadget uses a binary system with two modes: HIGH_PERFORMANCE (continuous measurement) and LOW_POWER (deep sleep). All the relevant settings are configured here.
- L.P. Mode: Displays the current mode. In LOW_POWER mode, the meter enters deep sleep between measurements.
- Wait: Waiting time (in seconds) before entering deep sleep following the last measurement. This allows the sensor to stabilise the reading.
- Sleep: The minimum time (in seconds) that the meter remains in deep sleep between cycles.
- WiFi everywhere: Every how many deep sleep cycles is Wi-Fi activated to send data (0 = never, 1 = every cycle, etc.)?.
- Redraw every: How many cycles does it take for the entire screen to be redrawn? This saves energy on E-Ink displays.
- BLE wake: If this is switched ON, the meter displays ‘BLE/BTHome’ when it wakes up.
- WiFi wake: If this is ON, it connects to Wi-Fi upon waking (required for MQTT).
- MQTT wake: If this is ON, it sends the data via MQTT upon waking. Requires Wi-Fi wake-up.
- ESP-NOW wake: If this is ON, it sends data via ESP-NOW upon waking. Requires Wi-Fi wake.
- Display wake: If this is ON, the screen will light up when the device wakes up. Use this to prevent the screen from lighting up if you just want to send data.
- Display reverse wake: If this is ON, it turns on the display when the CO₂ level FALLS below the orange threshold. Useful for showing «all clear» after an alert.
Note: The screenshots for this menu are due for an update. The exact settings depend on your motherboard and the type of monitor. Please refer to the Guide to Energy Efficiency for a detailed explanation.
BTHome Publish Sensors
In the BLE > BTHome submenu, the «Publish Sensors» option allows you to select exactly which sensors are advertised via BTHome. The sensors are organised into three groups:
- Core: CO₂, Temperature, Humidity, Battery (enabled by default)
- Optional: PM2.5, Pressure, PM10, Battery Voltage
- No BTHome object: PM1.0, PM4.0 (use non-standard IDs 0xEE/0xEF; Home Assistant does not parse them)
Each sensor is an ON/OFF toggle. The menu automatically displays which sensors are available depending on the connected hardware, and which are omitted due to the BLE advertisement’s byte budget. PM sensors are automatically disabled in LOW_POWER mode (the fan does not have time to warm up during a short wake window).
The «BTHome key» option launches a serial port wizard to enter or generate a 32-character hexadecimal bind key for AES-CCM encryption. It can also be generated automatically by leaving the field blank.
WiFi Settings (details)
As well as the SSID, password and hostname, the Wi-Fi menu includes:
- Wi-Fi enabled: Enable or disable the Wi-Fi module. When it is OFF, the meter operates via BLE only.
- Visible web password: Shows or hides the characters of the Wi-Fi password when you type it in the menu.
- Fixed IP: This allows you to set up a static IP address if you do not wish to use DHCP (IP address, subnet mask, gateway).
Display Config (enlarged view)
The display options have been expanded compared with previous versions:
- Brightness: Screen brightness (TFT and OLED only, range 0–255).
- Off via USB: Turns the screen off when the meter is powered via USB (useful for keeping the light off at night).
- Orient: Normal or Reversed. Rotates the screen by 180 degrees. When reversed, the up and down buttons swap functions.
- Temperature / Humidity / Battery / CO2 / PM2.5: Show/Hide toggles for each parameter on the main screen.
- Time to show off: The time, in seconds, after which the screen switches off automatically (TFT/OLED only).
ESP-NOW Config
The ESP-NOW settings include an activation toggle and two additional fields:
- ESP-NOW Enable: Enable or disable ESP-NOW.
- Time since the ESP-NOW publication: Interval (in seconds) between data transmissions via ESP-NOW.
- Board ID: Unique device identifier on the ESP-NOW network.
- Peer MAC: MAC address of the destination device. By default, this is set to broadcast (FF:FF:FF:FF:FF:FF).
Battery Config
Accurate battery settings for a correct percentage calculation:
- Battery Voltage: Displays the current voltage in real time (read-only).
- vRef: ESP32 ADC reference voltage (typically 3.3V or 1.1V, depending on the board).
- Battery Full: Voltage in millivolts when the battery is fully charged.
- Battery Empty: Voltage in millivolts when the battery is almost flat.
These values enable CO2 Gadget to calculate the remaining battery percentage accurately. If the values are not correct for your battery, adjust them via this menu.
Temperature Settings
Temperature sensor settings:
- Offset: This allows you to compensate for the temperature reading if the sensor is close to the ESP32 and becomes hot. For example, in a sandwich-style assembly, an offset of -2 to -5 degrees is usually sufficient.
- Decimal places: Number of decimal places to be shown for the temperature on the display.
Output Configuration (details)
As well as the buzzer, the outputs menu includes settings for the NeoPixel LEDs:
- GPIO Outputs: Select whether the GPIO outputs are used for LEDs or relays (operating mode).
- Buzzer: OFF, One time (beeps once when it reaches red), Every x (repeats every N seconds; configurable between 5s and 5 min).
- Neopixels: Type of NeoPixel strip connected.
- Neopixel brightness: NeoPixel LED brightness (0–255).
Additional screenshots
For visual reference, here’s what the menu looks like on the various compatible screens:
Did you find this useful? Share this article. Any questions? Ask in the Telegram group.