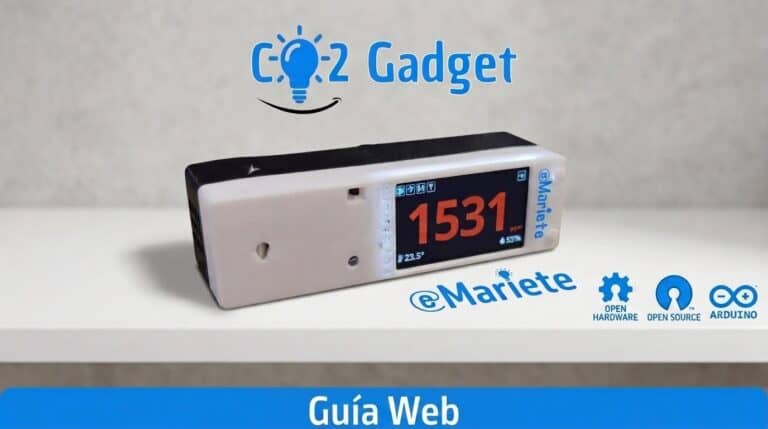
The CO2 Gadget web interface allows you to configure, monitor and update your meter from any browser, without having to install anything on your computer. Access it by typing http://CO2-Gadget.local in the address bar, or directly to the device’s IP address if you prefer.
The design follows the Apple style: an automatic dark background (which adapts to your system’s theme), clean typography and smooth animations. The top menu contains shortcuts to Home and Charts.
Navigation
The top navigation bar has two sections:
- 🏠 Home — home page showing real-time indicators
- 📈 Charts — direct access to historical charts
The icons on the right are:
- ⓘ — device information and versions
- ⚙ — access to preferences (equivalent to /preferences.html)
- ⛶ — full screen
Available pages
| Page | URL | What it offers |
|---|---|---|
| Home | / | Real-time dashboard showing the three indicators |
| Charts | /charts.html | Historical data with date filtering and export options |
| Calibration | /calibration.html | Live reading + forced FRC calibration |
| Low Consumption | /low_power.html | Configuring the HIGH_PERFORMANCE and LOW_POWER modes |
| Preferences | /preferences.html | All device settings grouped by section |
| Status | /status.html | Summary of active features, Wi-Fi RSSI and version |
| OTA | /update | Firmware update via the browser |
1 — Home (/)
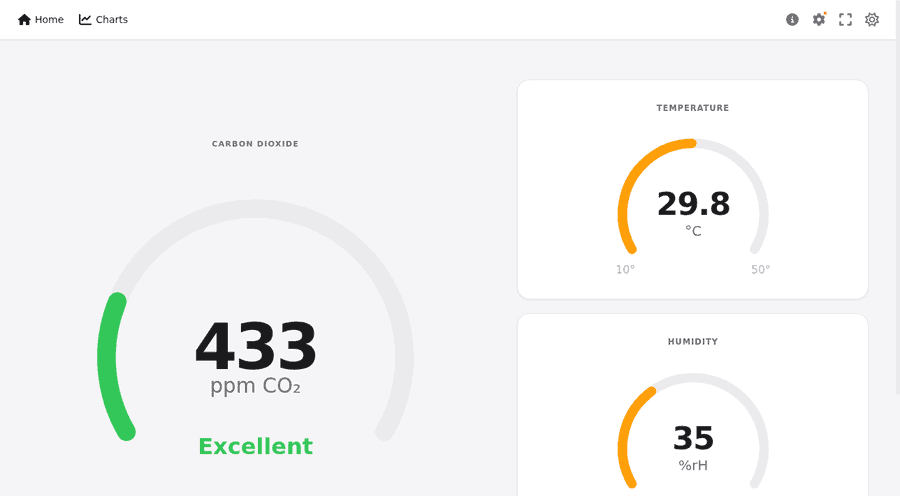
The dashboard displays the three indicators in real time, updating automatically:
- CO₂ — large on the left. The ring changes colour depending on the level: green (excellent, <800 ppm), orange (moderate) or red (high). Below it, the status is shown in text form («Excellent», «Good», etc.)
- Temperature — top right panel. Visible range from 10 °C to 50 °C
- Humidity — bottom right-hand panel
By default, the readings are updated every 5 seconds. If the sensor is warming up, this is indicated on the dashboard and the readings may be blank or fluctuate rapidly until they stabilise (typically 10–15 minutes for an SCD4x).
2 — Charts (/charts.html)

Chart.js displays historical CO₂ data using a blue line and circular markers. The Y-axis is in ppm; the X-axis is time.
Filter by date range
Uncheck the box «Date range» to view the full history. For a specific period:
- Click «mm/dd/yyyy, –:–« in the «From» field and select the start date and time
- Enter the same value in the «To» field»
- Click «Apply»
Export data
The export buttons generate a file containing all the data visible in the graph:
- CSV — spreadsheet (date, time, ppm). Ideal for Excel or Google Sheets
- JSON — structured data, useful for scripts or Home Assistant
- PNG — a screenshot of the current graph, ready to share
- SVG — vector, editable in Illustrator or Inkscape
3 — Calibration (/calibration.html)
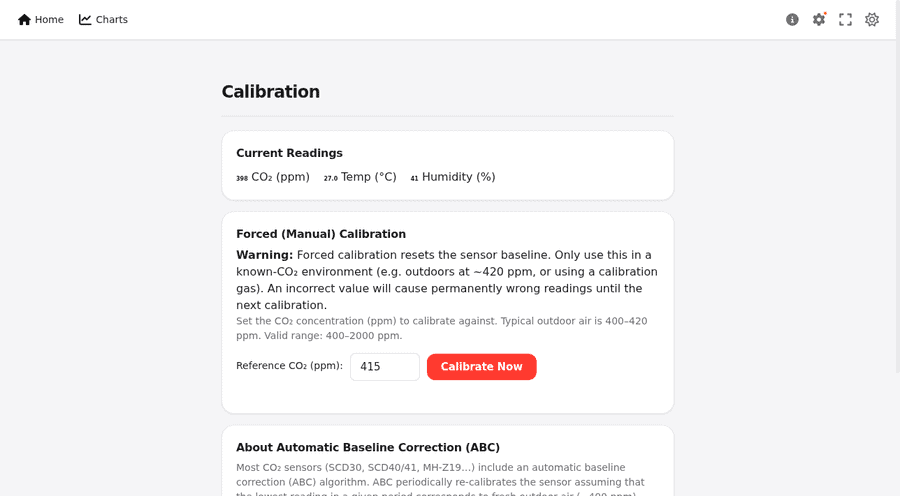
The calibration page has two functions: to read the sensor’s current value in real time, and to perform a forced calibration (FRC).
Apply an FRC calibration
- Open the window and place the meter in fresh air (window open, outdoors, at least 400 ppm of CO₂)
- Wait 5–10 minutes for the reading to stabilise
- Enter the reference value in the ppm field (typically 400 ppm (if you’re outdoors)
- Click «Calibrate»
- The firmware applies the correction and the sensor then starts to give correct readings
It only works with sensors that support FRC: Sensirion SCD30, SCD40 and SCD41. The MH-Z19 and Senseair S8 use 400 ppm calibration (via the menu) or automatic ASC.
4 — Low Power (/low_power.html)

This allows you to switch between the two binary modes available from v0.16.x:
- HIGH_PERFORMANCE (0) — continuous operation, all radios active, deepest sleep disabled
- LOW_POWER (1) — deep sleep with periodic wake-ups. The interval is set in seconds
In LOW_POWER mode, the meter wakes up, takes a reading, sends data via MQTT if configured to do so, and goes back to sleep. This is what enables a battery life of up to 3 months with an 18650 battery.
5 — Preferences (/preferences.html)
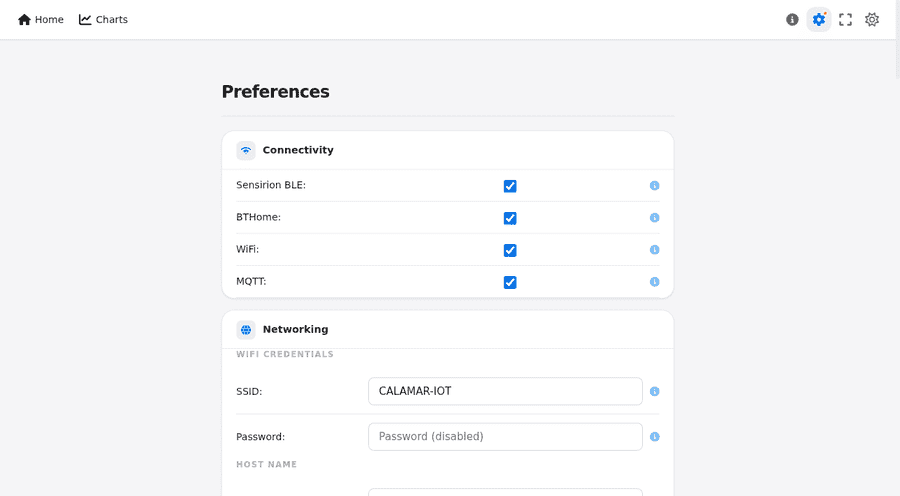
It is the most comprehensive page. It contains all the device settings, organised into sections:
- Wi-Fi — SSID, password, static IP address, hostname
- MQTT — broker, topics, username/password, Discovery prefix
- BLE — activate, BTHome, MyAmbiance
- CO₂ sensor — model, calibration, pressure compensation
- Outings — relay, NeoPixel and buzzer settings
- Screen — brightness, dark mode, rotation
- Low Power — sleep mode and settings
All changes must be saved (button «Save») and then «Restart» so that they are implemented.
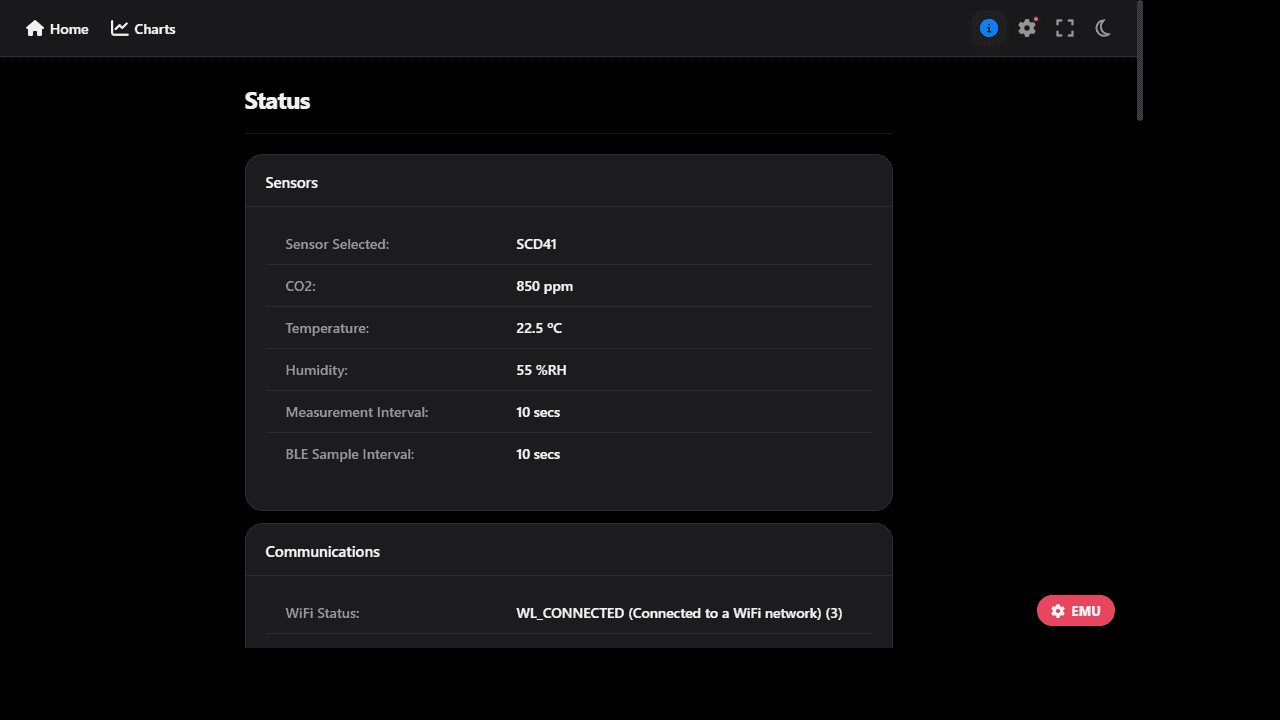
6 — Status (/status.html)

A quick summary of what’s up and running:
- Feature badges — indicators showing which wireless connections and functions are active (Wi-Fi, BLE, MQTT, BTHome, etc.)
- RSSI — Wi-Fi signal strength in dBm. Typical values: -30 (excellent), -70 (good), -90 (poor)
- Firmware version — check which version you have installed
7 — OTA (/update)

It allows you to update the firmware without cables or tools. All you need is the file .bin compiled for your board:
- Select the file
.binfrom your hard drive - Click «Update»
- The device receives the file, checks it and restarts automatically
- After the restart, open /status.html again and check that the version has changed
It works with Chromium-based browsers (Chrome, Edge, Brave). If the file is too large or has been named incorrectly, the interface will display an error message before it starts.
Access from outside the home
By default, the web interface is only accessible from the local area network (LAN). If you wish to access it from the internet:
- VPN — the safest option. Connect your mobile to your home network and access the local IP address
- Cloudflare Tunnel — create a free tunnel on cloudflare.com to expose the device without opening any ports on the router
- Port forwarding — ❌ Not recommended at all. Opening port 80 on the router to the device’s IP address exposes it directly to the internet without any additional layers of protection. If the device does not have a password set, anyone can access all its settings. Always use a VPN or Cloudflare Tunnel.
Password
By default, the web interface has no password. To configure it:
- Go to Preferences → Wi-Fi and enable the password
- Or from the device’s on-screen menu
⚠️ Password fields on the website are disabled for security reasons (passwords are transmitted in plain text over the network). If you need to edit it via the website, add ?relaxedSecurity=true to the URL:
http://CO2-Gadget.local/preferences.html?relaxedSecurity=true
TFT screenshot
The endpoint GET /screenshot Returns a PNG image showing what is currently displayed on the device’s physical screen. Very useful for debugging or documentation:
curl -o screen.png http://CO2-Gadget.local/screenshotNot all board models have a TFT display. OLED and E-Ink devices, as well as some TFT displays, do not support this functionality. In such cases, the endpoint returns a message stating that it is not supported. Even on boards with TFT displays, the colours may not be accurate. The screenshot feature is implemented on a best-effort basis: it remains available even if it is not perfect, as it can be useful for debugging.
Did you find this helpful? Share this article. Also have a look at the Menu Guide. Any questions? Ask on the Telegram group.