Why put a touch screen on a CO2 meter?
In this post, we are going to talk about an exciting new feature of a CO₂ meter: the colour touch screen. With a colour touchscreen, users can view data clearly and accurately, and interact with the device intuitively. Read on to learn more about how this feature can enhance your CO₂ meter experience!
There is no doubt about it, things come in through the eyes and a colour touchscreen for our home CO2 meter takes the project to another levelWho can resist a beautiful, full-colour touchscreen in the right size?
We already have a quality CO₂ meter, with a lot of functionalities and expansion possibilities, at a low price. Now it's time to give him a touch of luxury. Something we can do without, but we can What a load of crap!let's give each other a whim to be proud of and to have something that, when we show it to our friends and family and tell them "I made it myself", will cause the Wow! effect.
Here we have the creature in question, in one of its first versions (don't worry, it will get better and prettier with time):

Installation couldn't be simpler... just plug in four cables, load the file I'll provide below onto the MicroSD card in the display, and update and configure the meter.
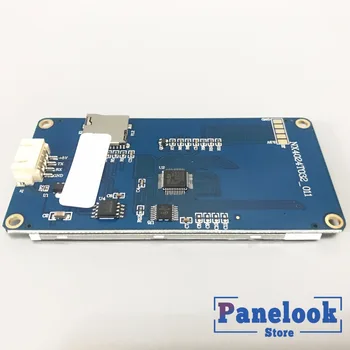
The secret is in the choice of screen: A Nextion smart display.
This is a very special screen (and I recommend it for use in any other project you have where you need a screen).
What makes this display different from the others is that it is not just a simple display, but rather has integrated all the user interface, such as graphics, buttons, etc. and has its own microprocessor to manage all that, and we only have to tell it what data we want it to "paint" in a certain place or wait for the screen to tell us "I have been clicked on such and such a place".
The big advantage is that you can design your own user interface with easy-to-use tools. (I have done it with PowerPoint) without the need for great technical knowledge.
I will soon have a "presentable" version that you can download from here. with all the instructions, so that you can incorporate it into your eMariete's homemade CO2 meter.
The screen we are going to use
While I finish it, If you want to buy it, I recommend you to do it in this AliExpress link, which is exactly the same screen I'm using (so you'll be sure not to have any problems):
If you buy it elsewhere be careful because there is an identical version, but in Chinese that after you will only be able to use with the Chinese editor (if you know Chinese you can ignore this comment 😉).
You already know that this article is an extension of the "eMariete home CO2 meter". If you haven't read it, start here:
How to add a touch screen to your CO2 meter
To add the touch screen to your meter, you will need the following:
- The right Nextion display
- The file you have to load on the screen
- A version of ESP Easy that supports the screen
- Configure the plugin
- Add the rules you need
I assume you already have the screen Correct. It is important that it is exactly the same model to make the file I have prepared work for you. Be careful because there are many models Nextion screens with small differences and it might not work for you. I recommend you to buy it from the link I gave you before.
Ahere you can download the file HMI for the Nextion display. Just load it with the Nextion editor on your screen and adjust the rules.
Please note that the Nextion plugin not included in the normal build build of ESP Easy. You'll need the build that includes "TEST" in the name (it's in the full package that you download from the ESP Easy release page on GitHub).
Save it to your ESP8266 and add it as a device in the "Devices" tab drop-down:

Now you have to configure the Nextion device to look like this (click on the image to see it in full):
Logically, you will have to change device names to your own. For example, in line 1, if your sensor is called CO2 and the value is called PPM, you would put [CO2#PPM].
With this your display will be working and every 15 seconds (the value indicated in the configuration under "Interval") the values will be updated.
The touch part and its rules are yet to be implemented, as although you can click with your finger and switch between the different screens, it is still is not finished implementing and ESP Easy does not get those clicks. I encourage you to move forward here and share your progress in the Telegram group so that other users can benefit from it.


I am interested in acquiring the Nextion screen for a CO2 meter but the link you offer here is out of date. Could you please give me more information about the screen to acquire it and try to assemble my meter, thank you.
Hello Angel.
I have updated the link to the screen.
Best regards.
hello good evening congratulations for the post, could you tell me how to add the screen in the configurator esp, thank you
Hello José Manuel.
It is explained in the article. I guess you must have skipped it.
Best regards.
good evening congratulations could you put the link to download the screen for esp easy, thank you
Hello José Manuel.
You have the link to download the screen in the article.
Best regards.